Audio Editor
Essentials
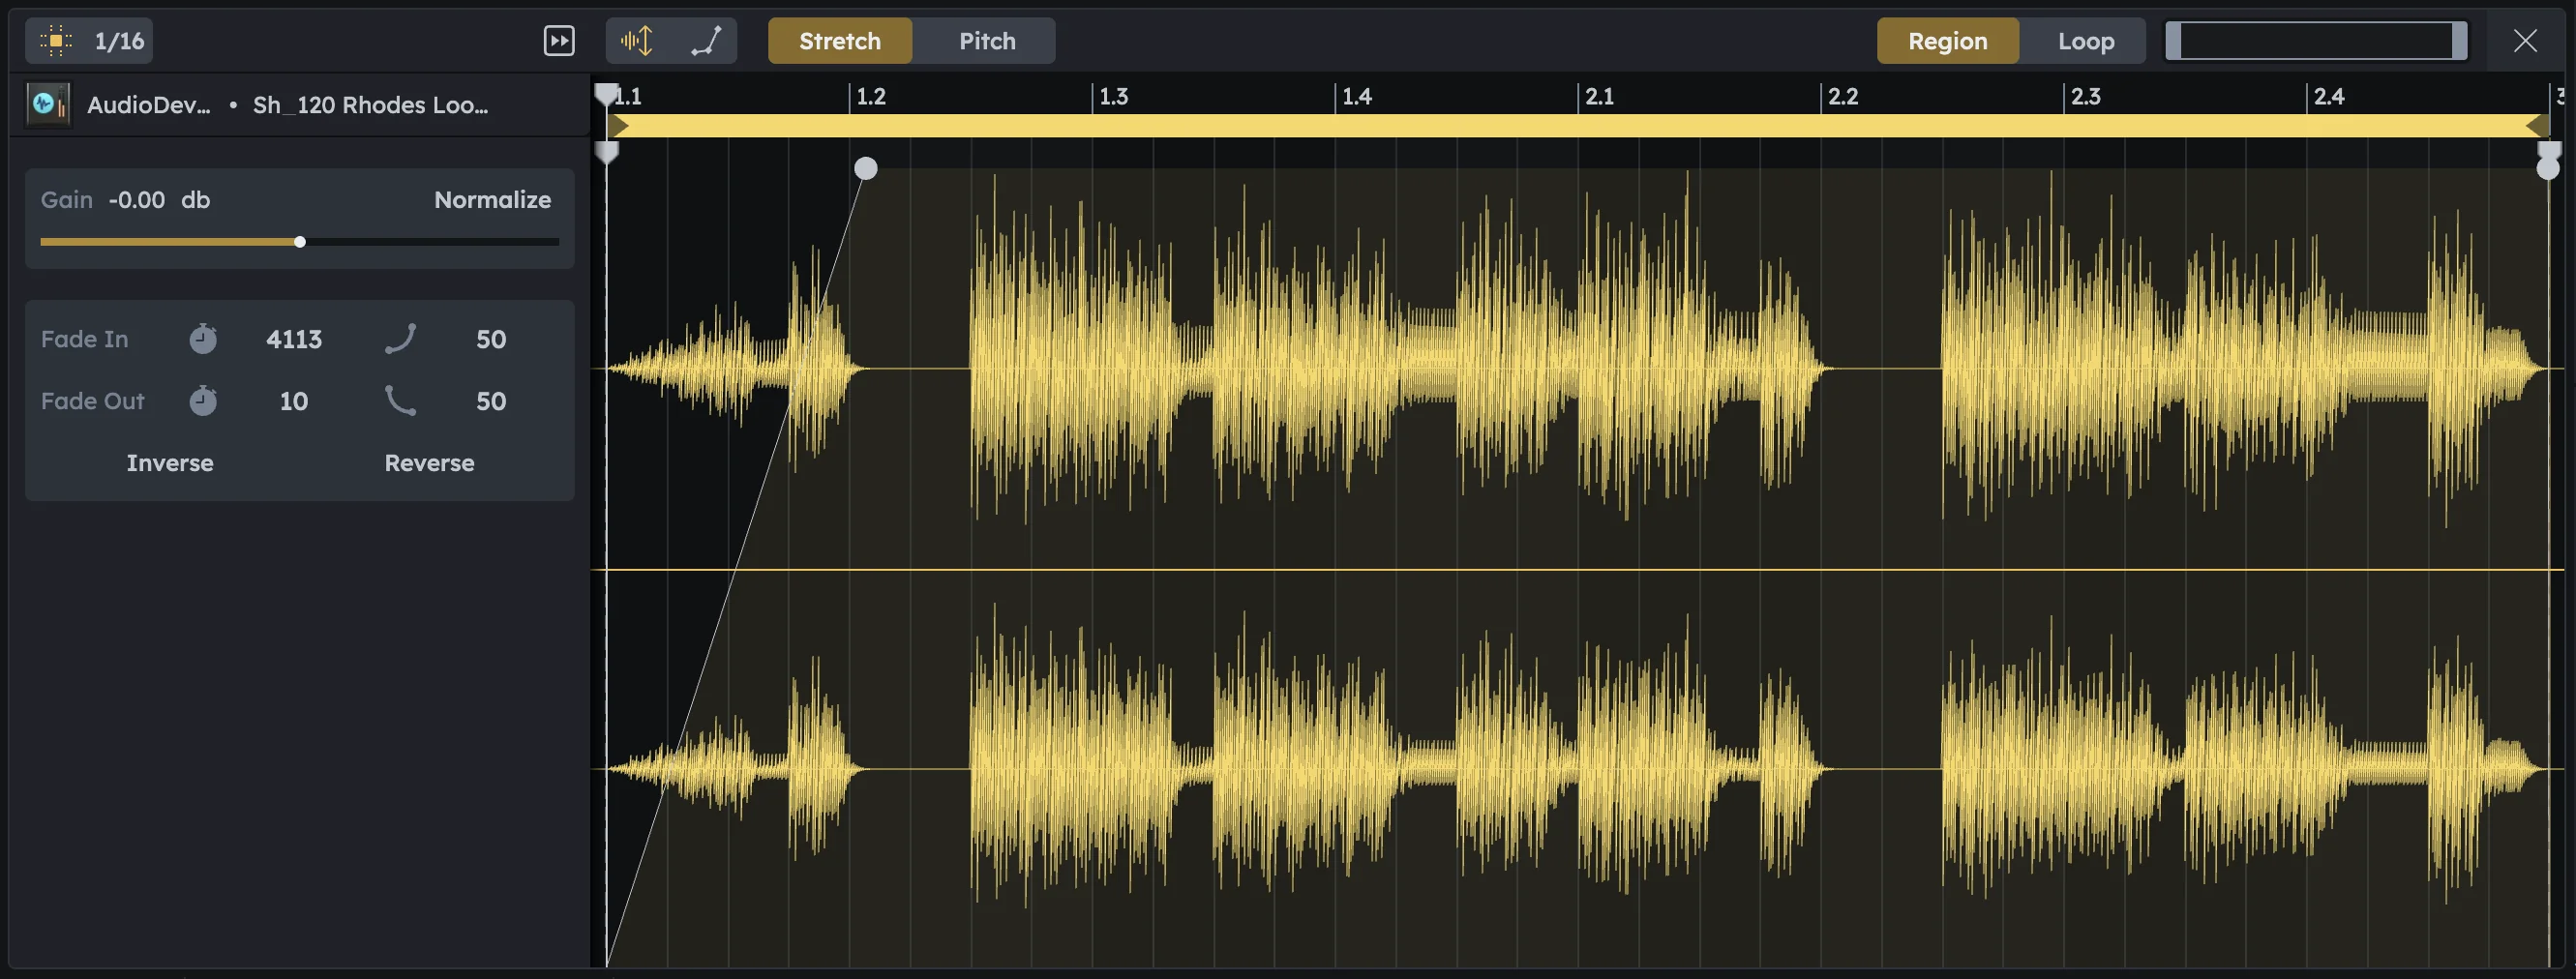
Audio & Sample Editor refines audio regions with fades, gain, timing fixes, pitch effects, and reverse. Double‑click any audio region to open it. Perfect for cleaning up recordings, fixing timing issues, adding smooth fades, or creating creative effects.
Fade in/out for smooth transitions between regions
Warp markers for timing correction and creative effects
Pitch adjustment for correction or creative effects
Gain control for level balancing
Reverse and inverse playback for creative effects
Open/Close
Open |
|
|---|---|
Close |
|
Fading In & Out
Every audio region includes built-in fade controls:
Handles |
Small circular handles at the start and end of the waveform let you Drag fade-ins and fade-outs directly. |
|---|---|
Panel Controls |
The left panel also provides numeric fade length and curve settings. |
Both methods control the same fades, so you can work visually or precisely.
Pitching
Adjust the pitch of the audio region independently of timing, allowing you to transpose samples, match keys, or create creative pitch effects.
Display |
The current pitch value in semitones |
|---|---|
Pitch-Shift |
Drag the slider to adjust pitch in full semitone steps from -24 to +24 semitones (two full octaves up or down). Quick way to transpose by octaves or musical intervals. |
Fine-Tuning |
Drag the knob for fine pitch adjustment from -0.5 to +0.5 semitones. Perfect for micro-tuning or subtle pitch corrections. |
Reset |
Click the to reset pitch to 0 semitones (original pitch). |
Starter Tip
Starter Tip
Before pitching, make sure Stretch is selected and not “Pitch”. Otherwise, the pitch will not be applied.
Warping
Add a warp marker at the clicked time.
Double‑click above the waveform (just below the ruler).
Adjust timing by moving the marker.
Drag a warp marker left or right to stretch or compress timing between its neighboring markers.
Control marker snapping behavior.
Adjust the grid snap (toggle grid or change grid size) to control how markers snap while Dragging.
Remove unwanted markers.
Select a warp marker and remove it with Right‑click Delete or the Delete key.
Warping changes the timing (and optionally the pitch) of audio within a region.
Stretch |
|
|---|---|
Pitch |
|
Gain & Automation
Gain |
|
|---|---|
Automation |
|
Region & Loop View
The view switch in the top-right affects what you see in the editor, not how playback works.
Region |
Displays the entire region, including all trimmed content. Best for keeping the arrangement in mind. |
|---|---|
Loop |
Shows only the looped section of the region, hiding the rest for clarity. Great for fine-tuning loops. |
Inverse & Reverse
Two playback-altering tools are available:
Reverse |
Plays the region backwards from end to start, keeping the amplitude structure intact. |
|---|---|
Inverse |
Also plays the region backwards, but flips the amplitude progression — loud parts become quiet and quiet parts become loud. This creates a mirrored or unusual reverse effect. |
Practical Tips
Practical Tips
Tighten a drum loop: Add warp markers at each hit in Stretch mode, then align them to the grid.
Create a tape-stop: Switch to Pitch mode, add a warp marker near the end, and drag it to slow down and drop pitch.
Balance clip loudness: Use Gain to adjust sample volume before mixing.
Design risers: Reverse a cymbal, then drag the fade-in handle to create a smooth swell.
Experimental FX: Apply Inverse to vocals for reversed dynamics.