Basics
Essentials
The Audiotool interface is organized into key areas that work together to help you create, edit, and mix music. Understanding these main components will help you navigate efficiently and make the most of your workflow.
Global controls — Transport, project management, and playback
Timeline — Arrange and edit tracks visually
Library panel — Browse and add instruments, samples, and effects
Studio view — Route signals and build device chains
Mixer — Shape and balance your sound
On-screen piano — Preview sounds and play instruments
Global Controls
The global controls bar provides essential transport controls, project information, and quick access to key functions.

Hub |
Opens the hub to start new projects or open existing ones |
|---|---|
Project Name |
Opens the project/track properties dialog |
Undo / Redo |
Step backward/forward through your edit history |

Play/Pause |
Start or pause playback.
|
|---|---|
Stop |
Stop playback and return to start |
Loop |
Toggle looped playback |
Record |
Enable recording mode F9 |
Metronome |
Toggle metronome with menu for count-in settings |
Options |
Additional metronome settings |

Current Time |
Shows the current playback position in time |
|---|---|
Bars |
Shows the current bar position |
Tempo |
Displays and allows adjustment of the project tempo (BPM) |
Groove (Swing) |
Controls the swing feel and timing feel of the project |
Time Signature |
Displays and allows adjustment of the musical time signature |
Options |
Choose which playback info items are shown |

Publish |
Publish your project to share it with others |
|---|---|
Invite |
Invite collaborators to work on your project |
Help |
Access help documentation and support |
Timeline
The timeline is where you arrange tracks, edit regions, and build your musical arrangement. It provides tools for precise editing and navigation.

First Row (Timeline header)
Cursor Tools |
Pointer (select/move), Cut/Scissors (split regions), Stretch (time-stretch MIDI & audio regions). See MIDI Editor, Audio Editor for details on region editing |
|---|---|
Mini Overview |
Sets Timeline zoom level for navigation |
Track Height |
Adjusts the vertical size of tracks for better visibility. Expand tracks for detailed editing or shrink them to get a better overview of your arrangement. |

Second Row
Snap to Grid |
Toggle snapping on/off for precise region placement |
|---|---|
Grid Resolution Menu |
Choose grid divisions (e.g., 1/4, 1/8, 1/16) for alignment |
Follow Playhead |
Auto-scroll the Timeline during playback to keep the playhead visible |
Timeline Settings |
Timeline-specific options and preferences |
Loop Range |
Define a looped playback area on the ruler |
Library
The library panel on the left provides access to all your content and devices. It’s organized into tabs for easy browsing and discovery.
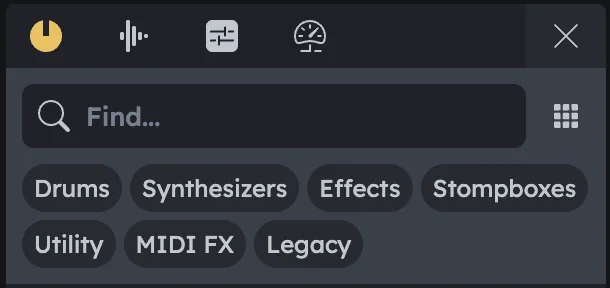
Samples |
Browse and filter samples and loops. Drag them into the Timeline or onto sampler devices. Type filters (All / Loops / One-Shots). Loops show a BPM field that defaults to the project tempo but can be changed |
|---|---|
Presets |
Load device presets. Right‑click a device → Load Preset to see only compatible presets |
Devices |
Add synthesizers, drum machines, effects, and utilities. Drag synths/drum machines directly to the Timeline; drag effects onto an instrument track to add them to its chain |
Advanced |
Grooves and Tuning controls (timing feel and project tuning). Settings can be adjusted while playing |
Studio
The studio view is a flexible workspace for placing and connecting devices. Build complex signal chains by routing devices together.
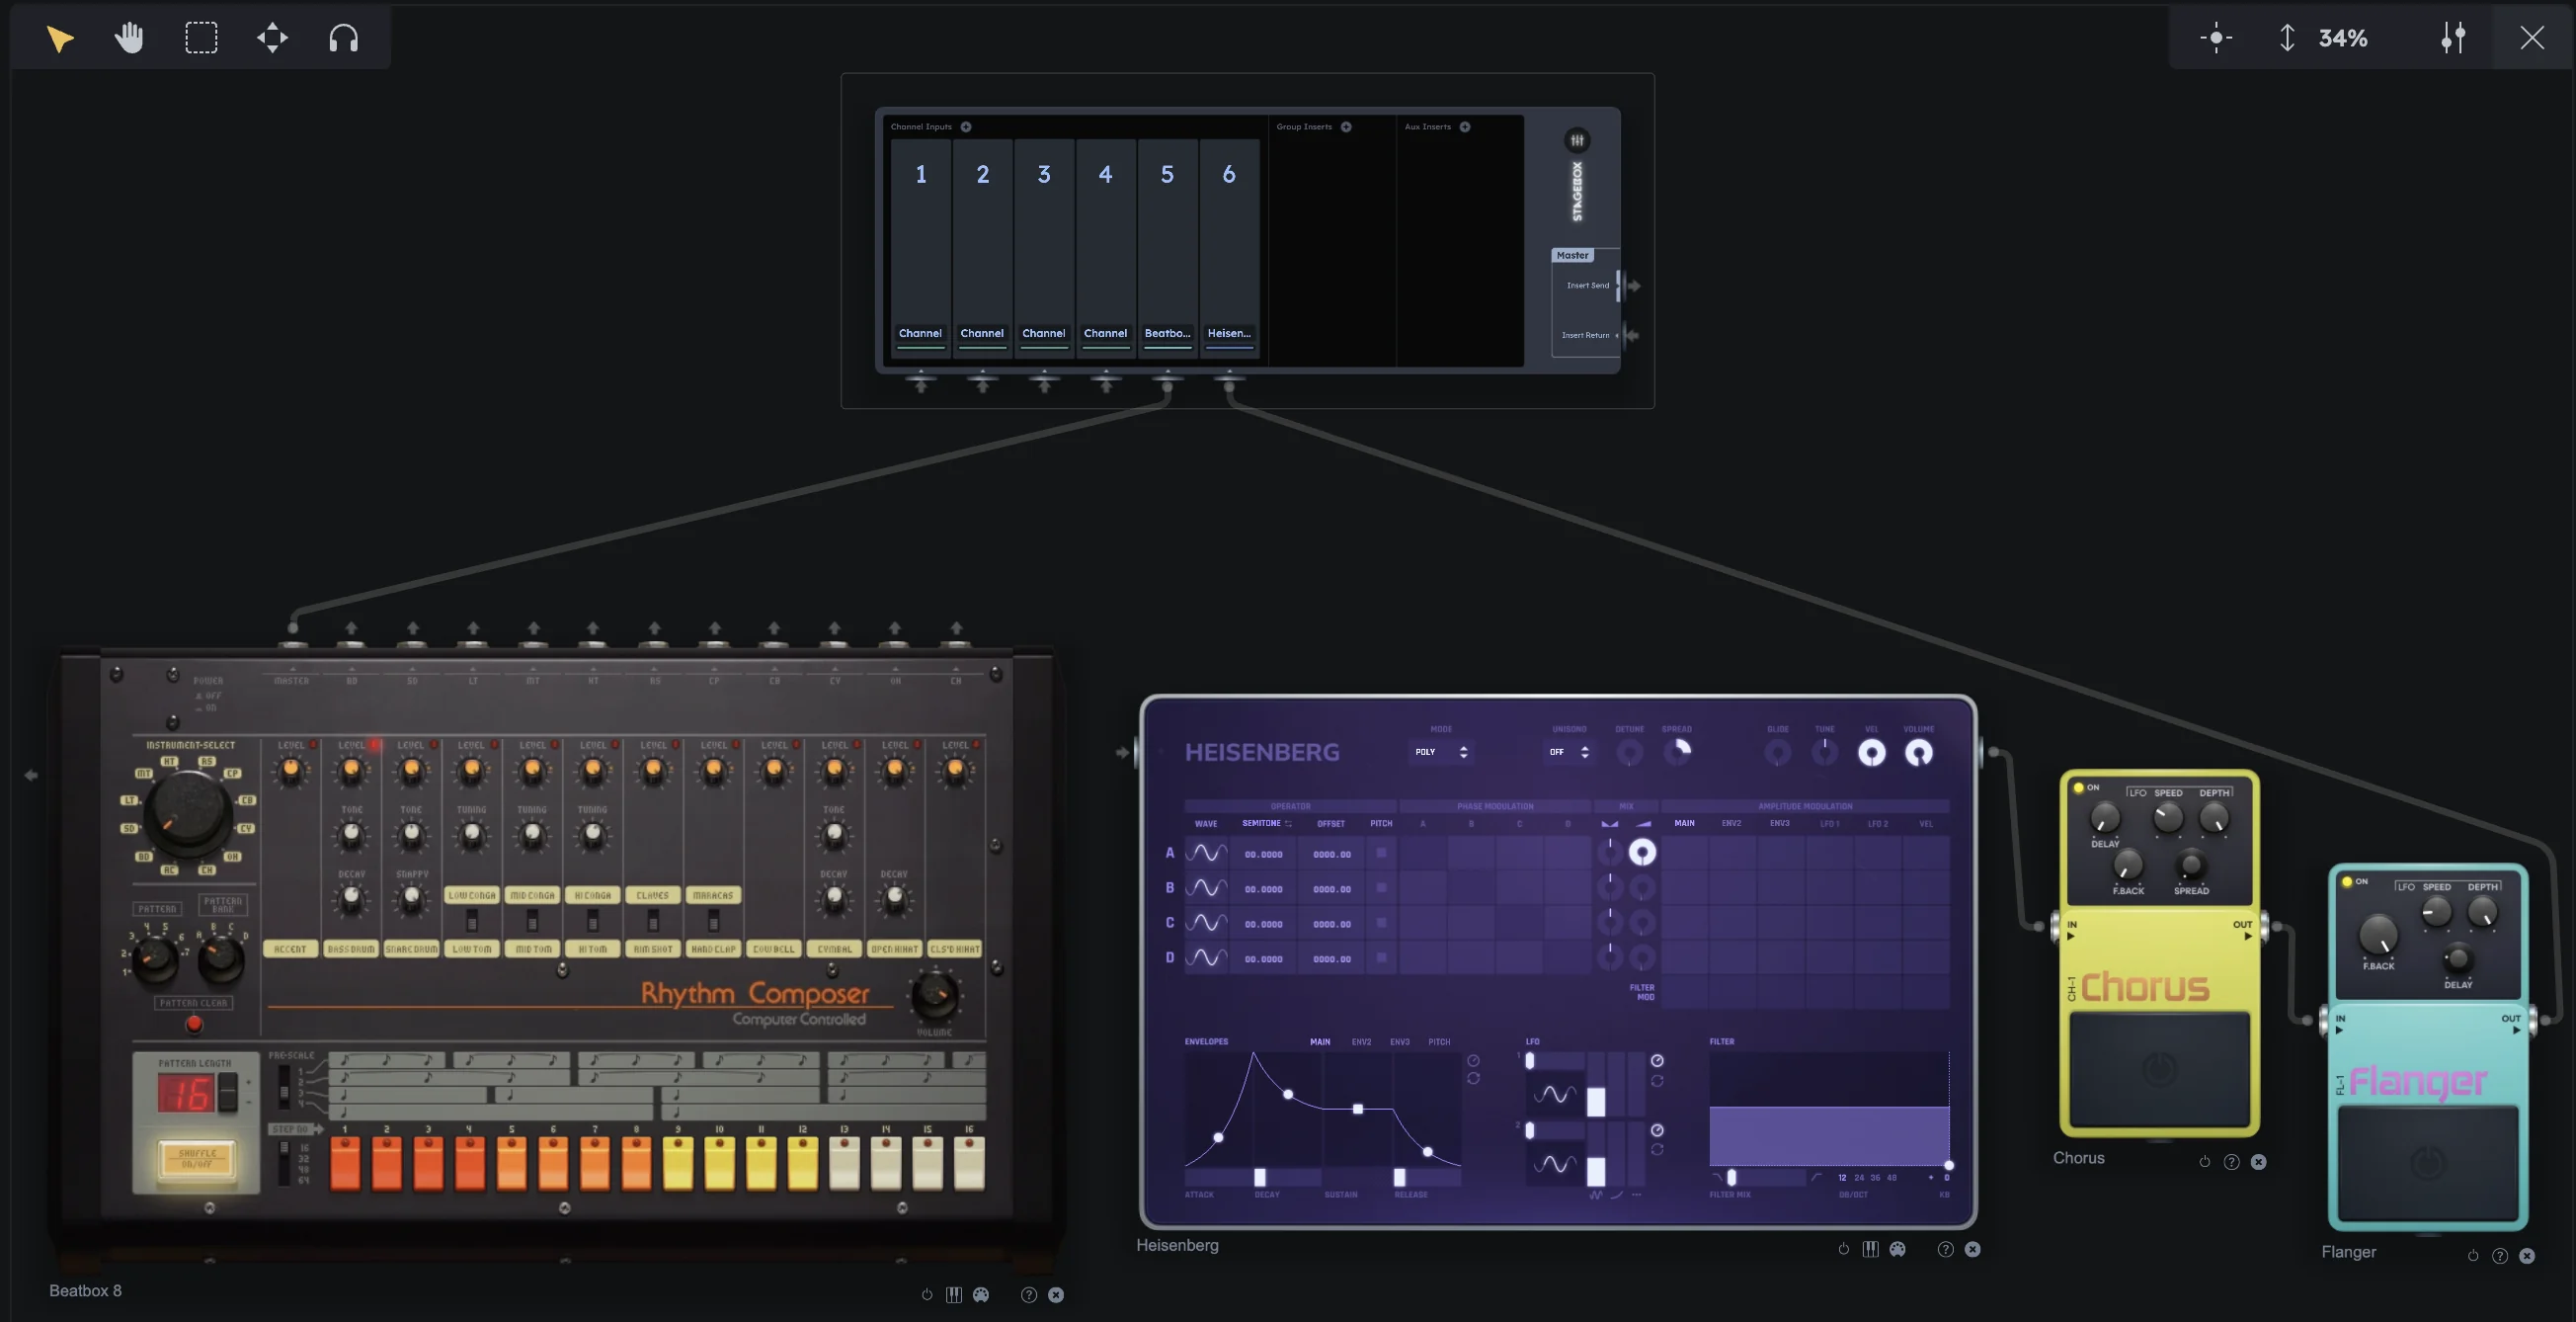
Device Placement |
Drag devices from the Library into the Studio to build your signal chain |
|---|---|
Virtual Cables |
Connect instruments and effects by dragging virtual cables between device outputs and inputs |
Flexible Layout |
Arrange and patch devices as needed for your workflow |
Mixer Options
The mixer settings panel on the right provides options for customizing the mixer view and behavior.
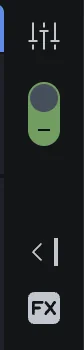
Dynamic Mixer |
Toggle (green toggle in the top right) to show only channels that correspond to selected devices or Timeline tracks, hiding unused channels for a cleaner view |
|---|---|
Show Master |
Toggle visibility of the master channel |
Show FX Channels |
Toggle visibility of the two built-in FX channels |
On-Screen Keys
The on-screen piano provides a convenient way to play instruments and preview sounds without external MIDI gear.

Mouse/Keyboard Input |
Play instruments with mouse clicks or computer keys |
|---|---|
Preview Sounds |
Handy for previewing sounds or testing parts without external MIDI gear |
Practical Tips
Practical Tips
Use the Library panel’s search to quickly find samples, presets, or devices
Right‑click devices in the Library to see context-specific options
Drag devices directly from the Library to the Timeline for faster workflow
Use the Studio view to create complex routing chains before adding to tracks
Enable “Follow Playhead” when editing to keep your work area in view
Adjust track heights in the Timeline for better visibility of complex arrangements
Use the on-screen piano to quickly test sounds before recording MIDI