Channels
Essentials
Each track automatically gets a mixer channel with comprehensive controls for gain, compression, EQ, effects, and routing. Use these channels to balance levels, shape tone, add dynamics, and position sounds in the stereo field before they reach the master output.
Gain and filter controls for level and frequency shaping
Compression with sidechain for dynamics and pumping effects
4-band EQ for tone shaping
Volume, pan, mute, and solo for mix control
Each mixer channel is made up of several sections, from top to bottom:
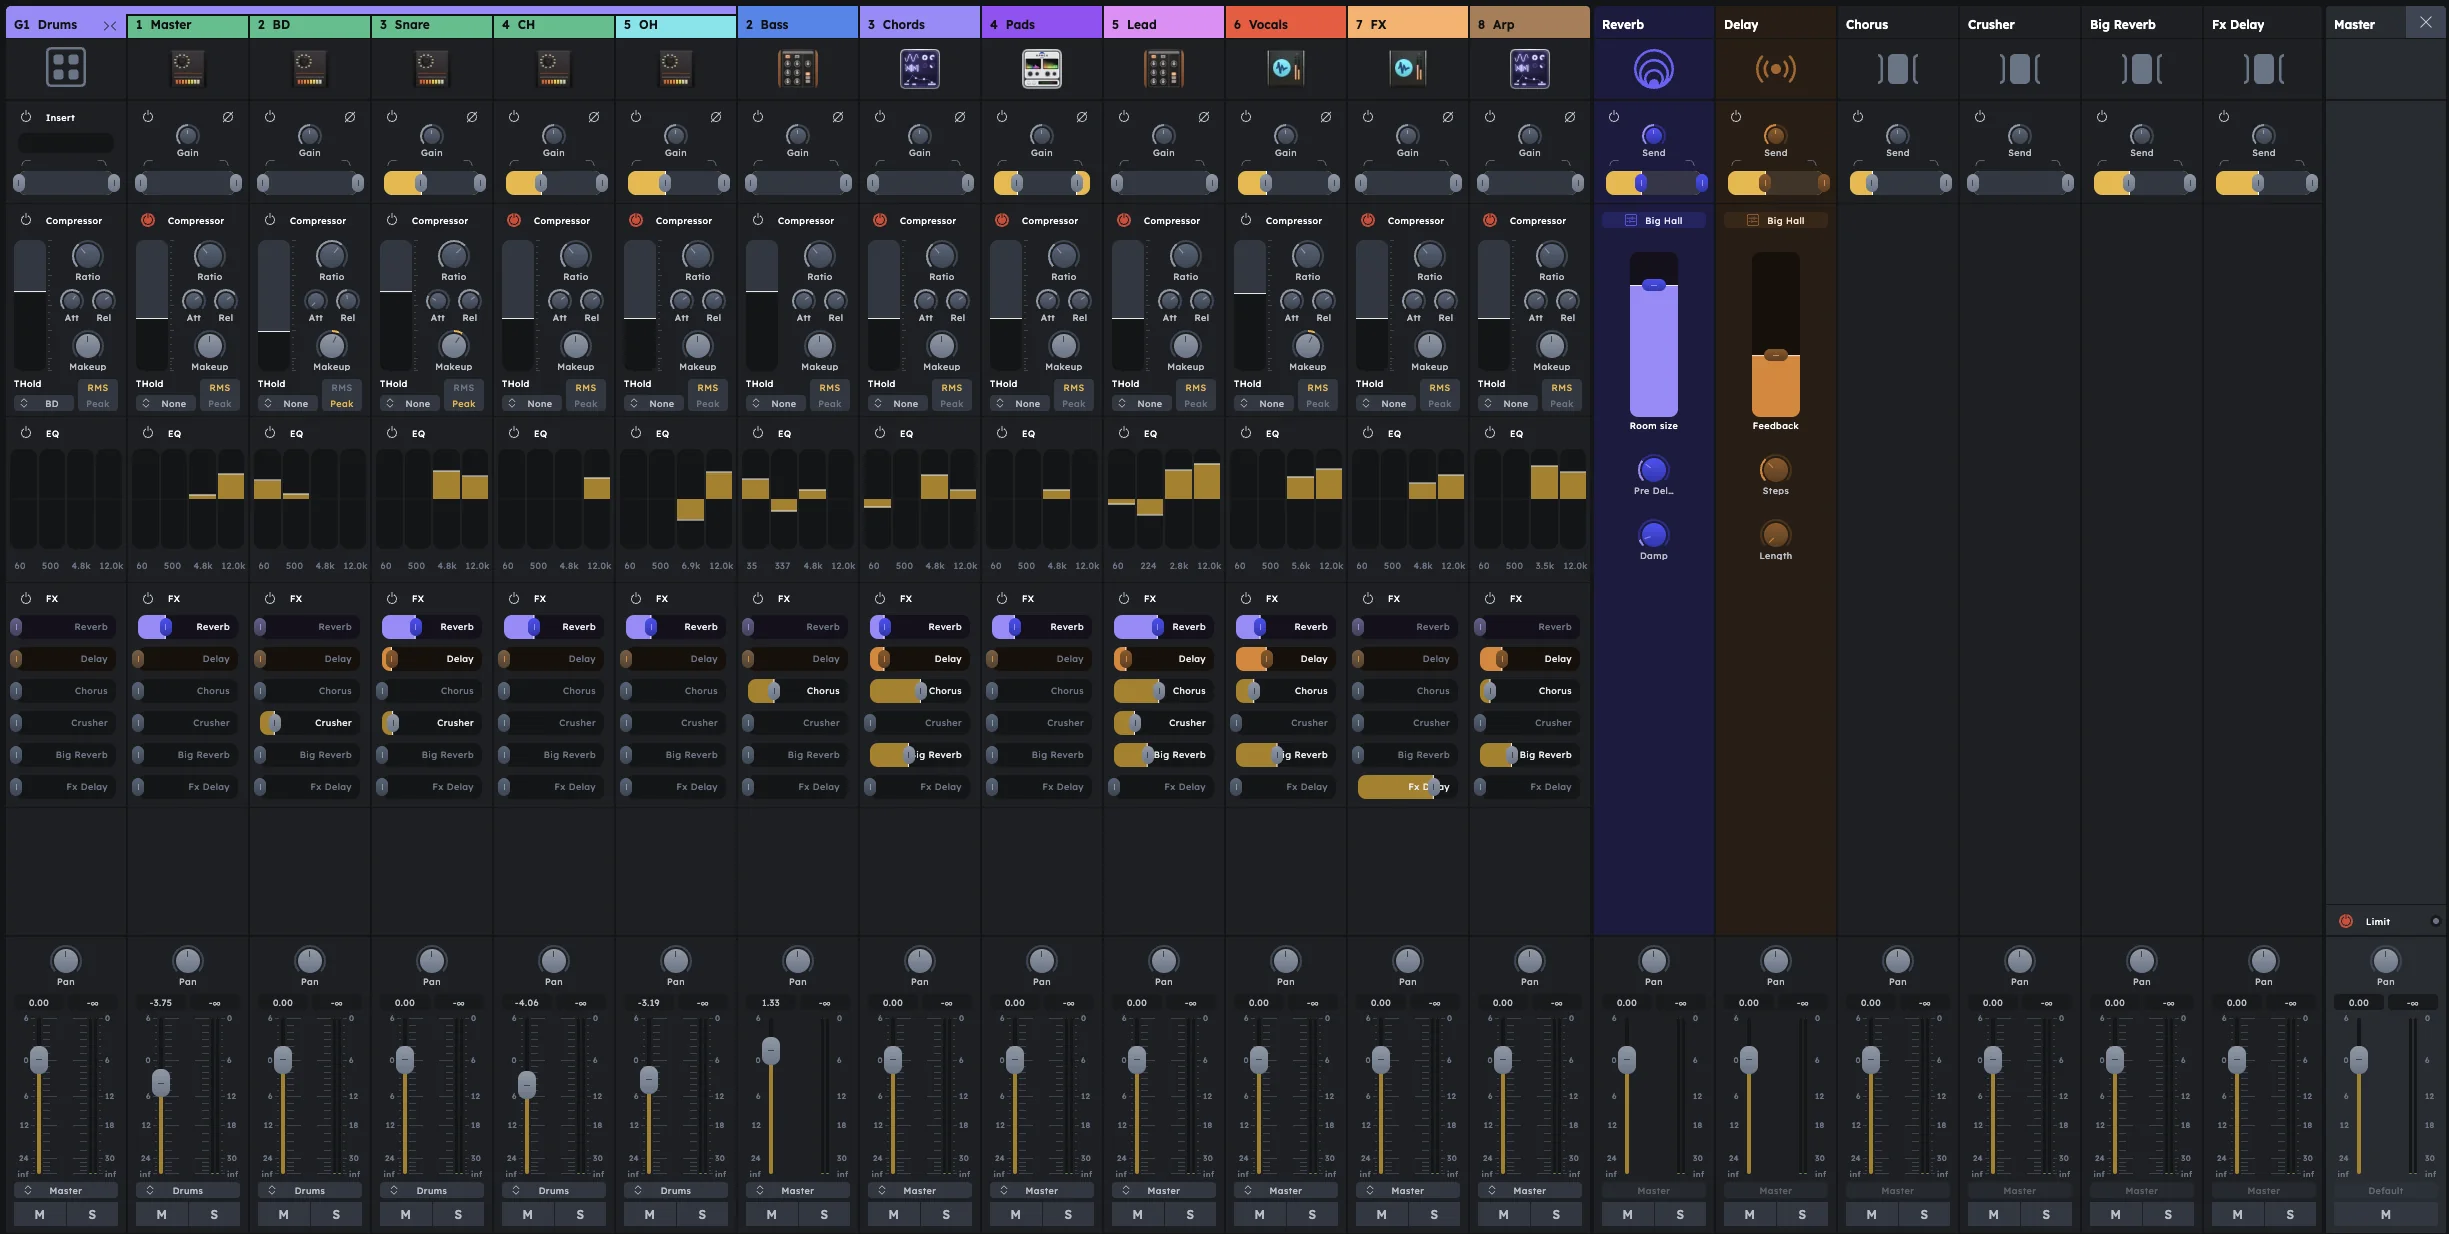
Gain & Filter
The gain and filter section controls the input level, phase, and frequency filtering before any other processing.
On/Off |
Only affects the filter — gain and phase are always active. |
|---|---|
Gain knob |
Sets the track’s starting loudness, before any other processing. Can be adjusted from -∞ dB (silence) up to +18 dB (boost). |
Phase |
Inverts the signal’s phase — useful for fixing phase issues when combining tracks. |
HP/LP filter |
Removes low/high frequencies below/above a chosen point. Helps clean up rumble or sub-bass or soften harsh highs. |
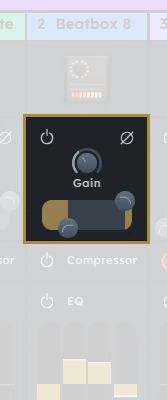
Compressor
The compressor module provides dynamic control to manage volume fluctuations and add punch to your tracks.
On/Off |
Turns the whole compressor module on or off. |
|---|---|
Threshold |
The volume level above which the compressor starts working. |
Ratio |
How much the signal is reduced once it passes the threshold (e.g., 4:1). |
Attack |
How fast the compressor responds once the sound exceeds the threshold. |
Release |
How fast it stops compressing once the sound drops back below the threshold. |
Makeup gain |
Boosts the output to compensate for volume loss caused by compression. |
Peak/RMS |
The detection mode used by the compressor:
|
Sidechain input |
Feed a signal from another mixer channel to trigger compression (great for ducking or pumping effects). |
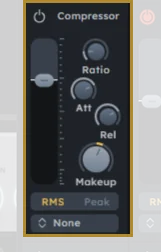
Equalizer (EQ)
The equalizer shapes the frequency response of your track, allowing you to boost or cut specific frequency ranges.
On/Off |
Bypasses the entire EQ module. |
|---|---|
4 bands |
The EQ has four frequency bands that can be adjusted independently. |
Gain control |
Each band can be increased or decreased separately to boost or cut frequencies. |
Frequency control |
You can tweak the frequency of each band to target specific ranges. |
EQ Tips
EQ Tips
Boost at 80 Hz to add warmth to kick drums; cut to reduce boominess.
Reduce 300 Hz to clean up muddiness in guitars or vocals.
Boost around 2.5 kHz for vocal presence; reduce around 4 kHz to tame harshness.
Boost above 8 kHz to add air to vocals or cymbals; cut to remove hiss or sharpness.
FX Sends
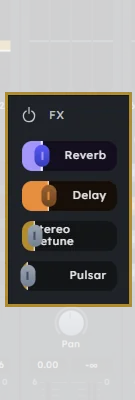
FX sends allow you to blend effects with the original signal, creating space and depth in your mix. They work like typical mixer sends—the original signal remains dry, and you control how much of it is sent to the effect.
Built-in Reverb |
Adds spaciousness and depth to your sound. Adjust the send level to control how much of the signal goes to the reverb effect. |
|---|---|
Built-in Delay |
Creates echo and rhythmic effects. Control the send amount to blend delay with the original signal. |
Custom |
In addition to built-in effects, you can add custom effects via the Stagebox (see FX Sends). These appear as additional send options in the mixer channel. |
Volume & Pan
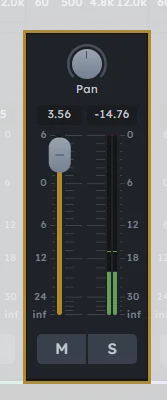
The volume and pan controls determine the final output level and stereo positioning of the track.
Volume |
Controls the final volume of the track going to the next stage. |
|---|---|
Pan/Balance |
Adjust left/right balance. |
Mute/Solo |
Mute or solo the track. |
Examples
Here are a few starting points for configuring mixer channels for common use cases:
Vocals
Compressor |
Medium threshold (-18 dB), 4:1 ratio, fast attack (10 ms), medium release (100 ms), makeup gain as needed. |
|---|---|
EQ |
Low-cut (high-pass) filter at ~80 Hz. Dip at 300 Hz to reduce muddiness. Boost at 2.5–3 kHz for presence. Slight boost above 8 kHz for air. |
FX |
Reverb (light room or plate), optional Delay synced to tempo. |
Drums (Kick, Snare, Hi-Hats)
Kick |
EQ: Boost at 60–80 Hz; slight cut around 400 Hz; add click around 2–3 kHz. Compression: Slow attack (20–30 ms), fast release (50 ms). |
|---|---|
Snare |
EQ: Boost at 200 Hz and 5 kHz for snap. Add short reverb or plate effect. |
Hi-Hats |
EQ: High-pass at 200 Hz, boost at 8–10 kHz. |
Bass
Compression |
Higher ratio (6:1), threshold around -20 dB. |
|---|---|
EQ |
Low Shelf boost at 80 Hz. Cut around 300 Hz to avoid muddiness. |
Sidechaining |
Consider sidechaining bass with the kick drum. |
Keys (Synths, Pianos, Electric Keys)
Compression |
Light compression for dynamic control. |
|---|---|
EQ |
Low-cut at ~100 Hz to make room for bass. Boost at 1–2 kHz for presence in the mix. Slight boost above 7 kHz for air (especially on electric pianos). |
FX |
Use delay or chorus for width; reverb for ambiance. |
Guitars
Electric Guitar |
EQ: High-pass at ~100 Hz, cut 300 Hz if muddy, boost 3–5 kHz for presence. Compression: Medium threshold, medium attack (10–20 ms), fast release. FX: Use delay and reverb to place it in space; distortion as needed via external FX. |
|---|---|
Acoustic Guitar |
EQ: High-pass at 100 Hz, slight boost at 200 Hz for body, and 4–6 kHz for string clarity. Use subtle compression to maintain consistency. Add room or plate reverb. |
These are just templates — always adjust settings based on your sound and arrangement.
For information on applying effects to channels, see FX Sends. To process multiple channels together, see Groups.
Practical Tips
Practical Tips
Start with gain staging: set each track’s gain so peaks hit around -12 dB before compression.
Use high-pass filters liberally to clean up low-end mud and make room for bass/kick.
Compress drums with slow attack (20-30ms) to preserve transients; fast release (50ms) for punch.
Sidechain bass to kick drum for classic electronic music ducking effects.
EQ subtractively first (cut unwanted frequencies) before boosting desired ones.
Keep master fader at 0 dB and mix with individual channel faders.
Solo tracks frequently to hear how each element sits in the mix.
Reference commercial tracks at similar volume levels while mixing.