Mixer
Essentials
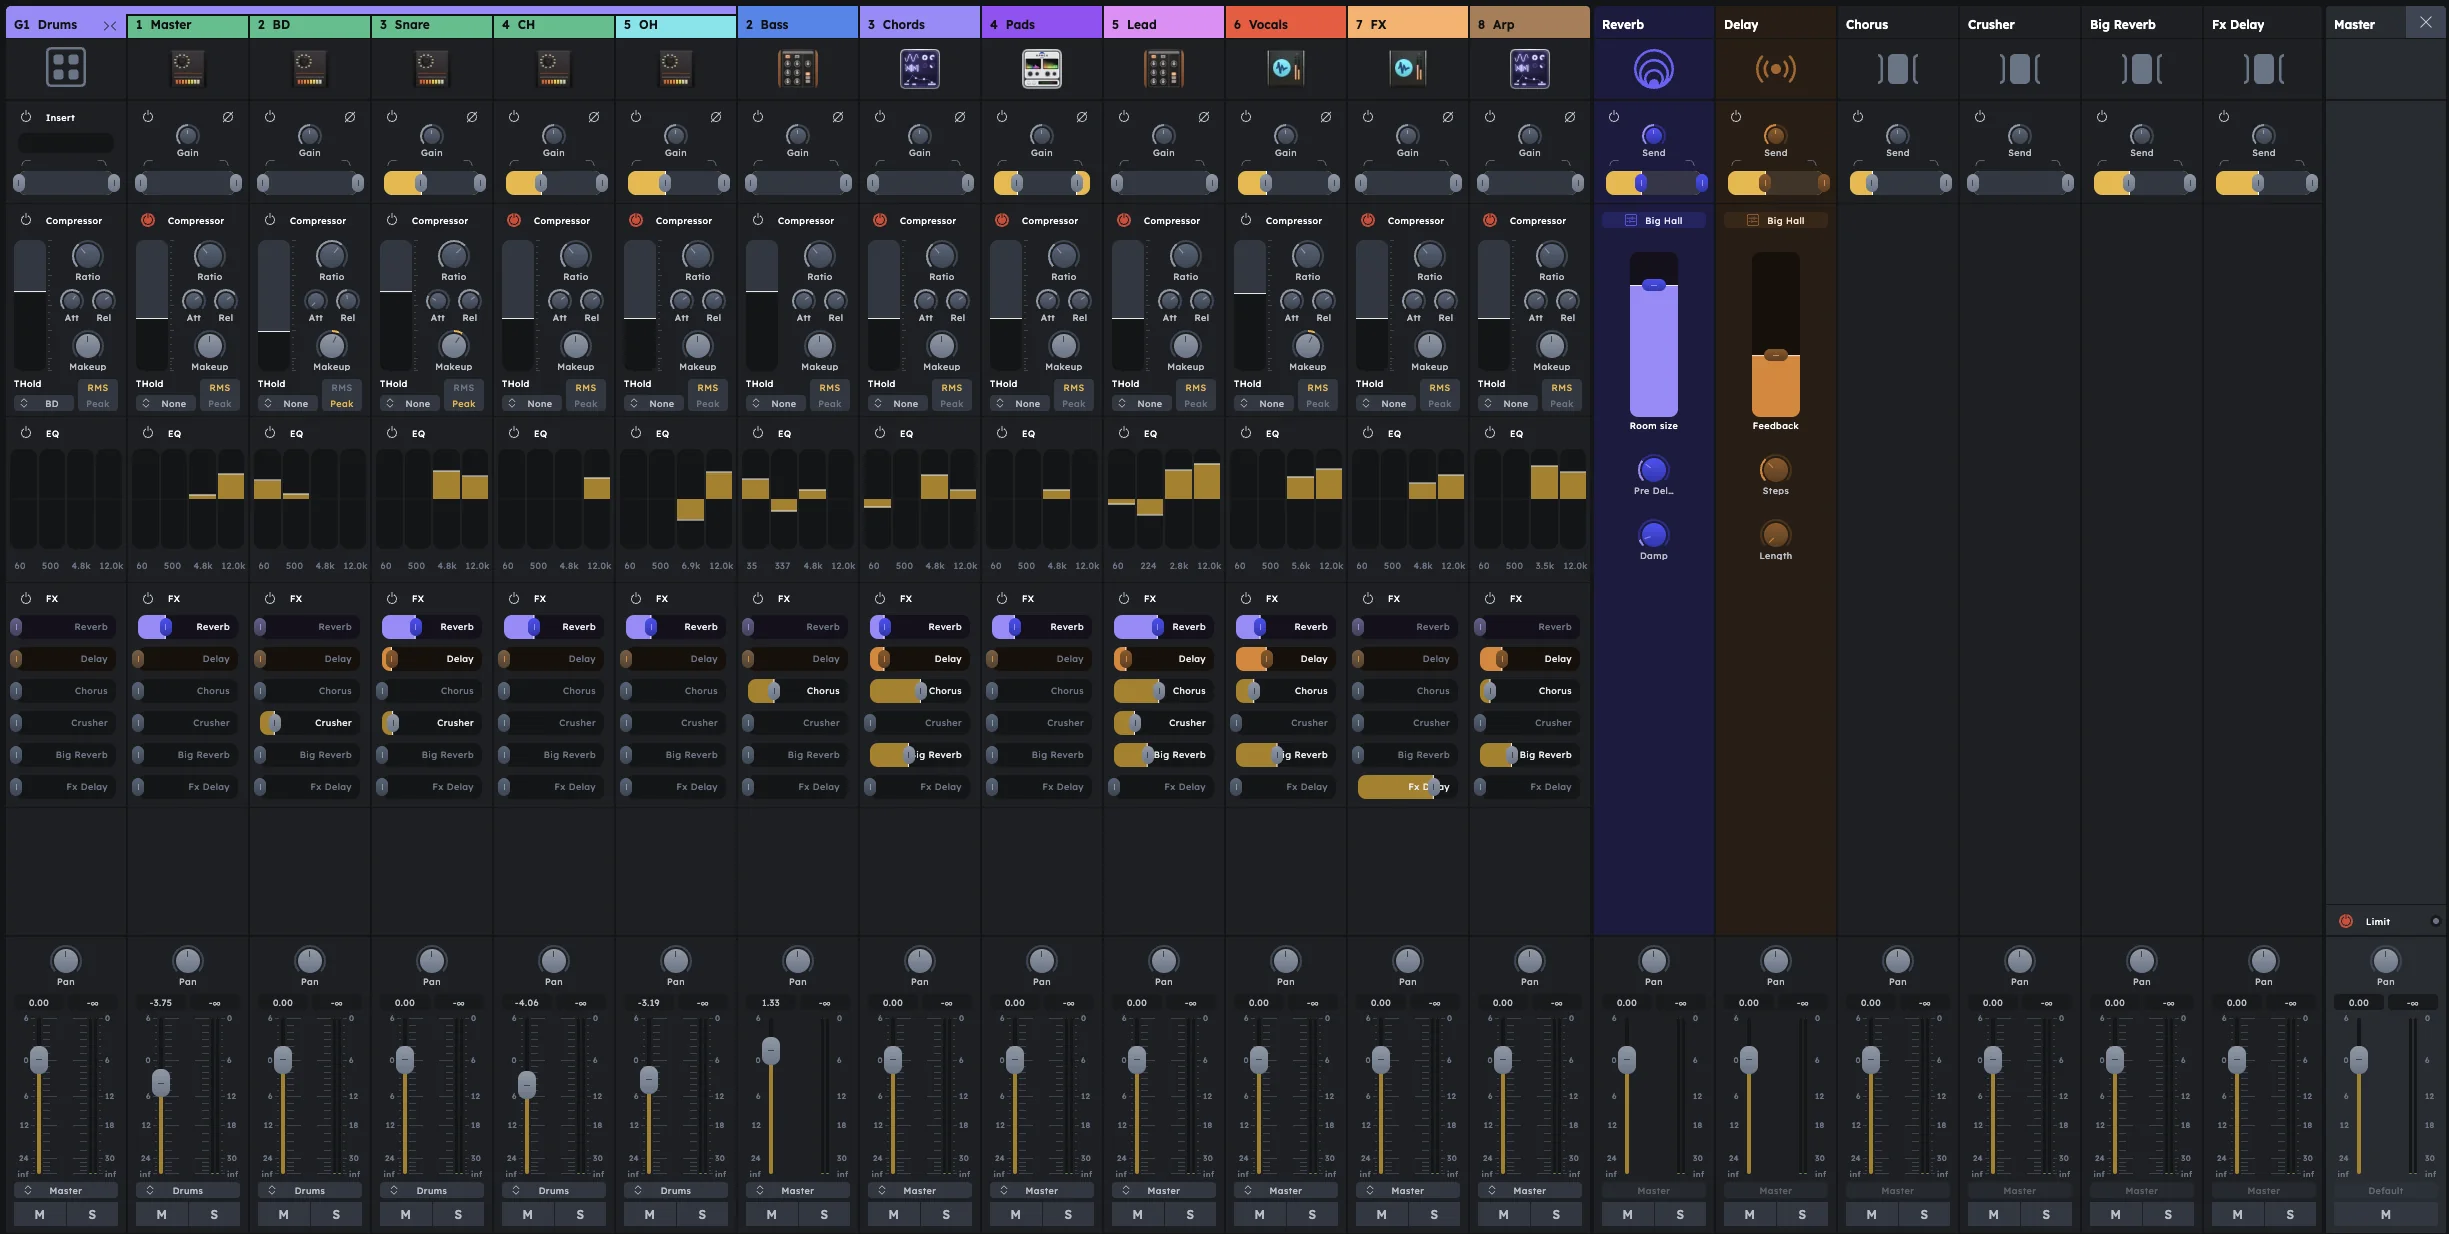
Mixer controls volume, effects, and sound shaping for each track in your project. Every track automatically gets a mixer channel with comprehensive tools for gain, compression, EQ, effects, and routing. Use it to balance levels, shape tone, add space, and create professional-sounding mixes.
Gain, compression, and EQ per channel
Built-in reverb and delay sends
Custom effects via Stagebox
Group channels for shared processing
Master channel with limiter
The mixer is the central hub for shaping and balancing your mix. Every track in your project automatically receives its own mixer channel, giving you complete control over volume, dynamics, frequency balance, effects, and routing.
Channels
Each track gets its own mixer channel with a full suite of processing tools:
Gain & Filter
Compressor
Equalizer (EQ)
FX Sends
Volume & Pan
Groups
Group channels combine multiple tracks for shared processing and control. They contain the same modules as regular channels (excluding gain) and provide an insert slot for custom effects processing via the Stagebox.
Groups are essential for processing related tracks together—like applying bus compression to all drums or shared reverb to all vocals.
FX Sends
Effects can be applied to tracks using built-in reverb and delay sends, or custom effects created in the Stagebox. FX sends allow you to blend effects with the original signal, creating space and depth in your mix.
Master
The master channel is the final stage where all audio converges before output. It includes a master insert for final effects processing, a built-in limiter to prevent clipping, and the master volume fader.
Stagebox
The Stagebox is the central hub for advanced routing and signal management. It interfaces directly with the mixer, providing modular control over channel inputs, group inserts, FX sends, and master routing.
Mixing
A typical mixing workflow:
Set levels - Use gain controls to establish proper input levels for each track
Shape frequencies - Apply EQ to clean up unwanted frequencies and enhance desired ones
Control dynamics - Use compression to manage volume fluctuations and add punch
Add effects - Apply reverb, delay, or custom effects via FX sends
Group related tracks - Combine drums, vocals, or instruments for shared processing
Balance the mix - Adjust volume and pan to create a cohesive stereo image
Final processing - Apply mastering effects and limiting on the master channel
Practical Tips
Practical Tips
Start with gain staging: set each track’s gain so peaks hit around -12 dB before compression
Use high-pass filters liberally to clean up low-end mud and make room for bass/kick
Compress drums with slow attack (20-30ms) to preserve transients; fast release (50ms) for punch
Sidechain bass to kick drum for classic electronic music ducking effects
EQ subtractively first (cut unwanted frequencies) before boosting desired ones
Use groups for drums, vocals, or instruments that need shared processing
Keep master fader at 0 dB and mix with individual channel faders
Solo tracks frequently to hear how each element sits in the mix
Reference commercial tracks at similar volume levels while mixing